
How to be a photographer
December 20, 2020
Adobe Photoshop CC 2020 Full Version Free Download with Crack
January 2, 2021Do you know that you can transform your white color background or any color background image to a transparent one with just a few clicks on Adobe Photoshop? If no, then this article is for you.
Having professional software like Adobe Photoshop for your background removal service is great. However, the professionalism of your artwork is still at stake if you don’t have the basic knowledge of how it works. And for this reason, we are sharing the tutorial guide “How to Make Transparent Background in Photoshop”.
Watch the Video Tutorial:
If you think, the video wasn’t enough for you then continue reading the post.
Tutorial Guide on How to Make Transparent Background in Photoshop cc 2020
Find below the stepwise guide to transform your solid color backgrounds to make a transparent background with Adobe Photoshop CC 2020.
1. Install an Adobe Photoshop Software in your pc
After downloading the band installing a suitable version of Photoshop on your Mac/Windows OS. Once the installation is over, launch the app to import your desired image.
2. Open an Image in Photoshop
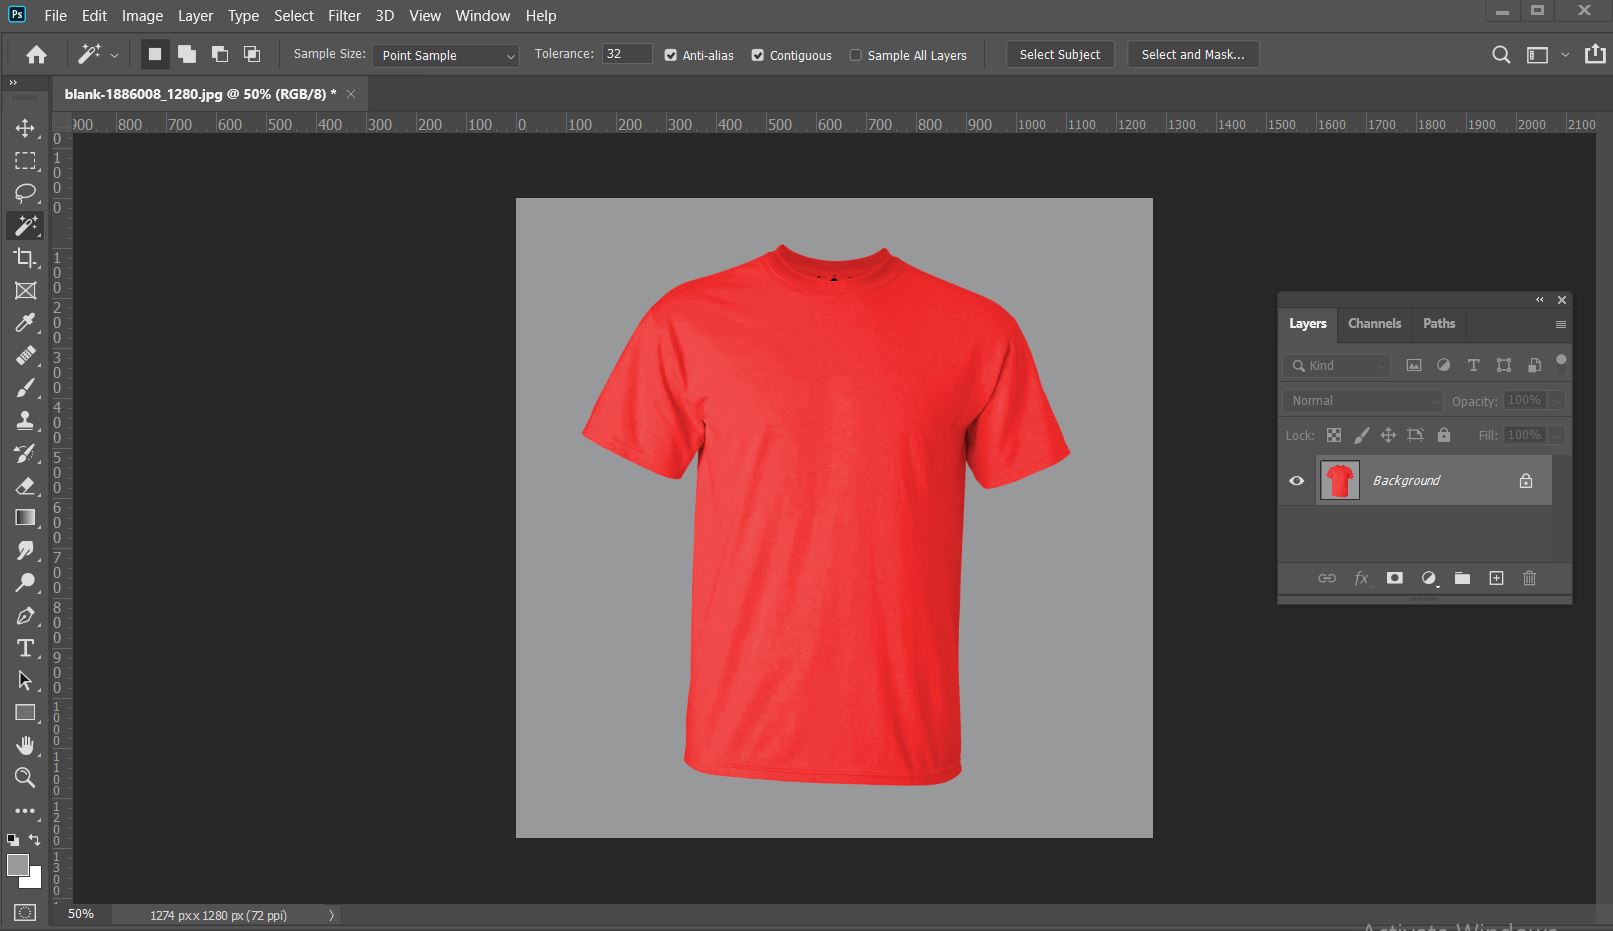
Next, locate and click on the File button at the top left corner of your screen. Select Open from the drop-down menu that pops up and you will be directed to your device file manager where your images are saved. Choose a picture and then tap on Open.
3. Unlock the Background layer
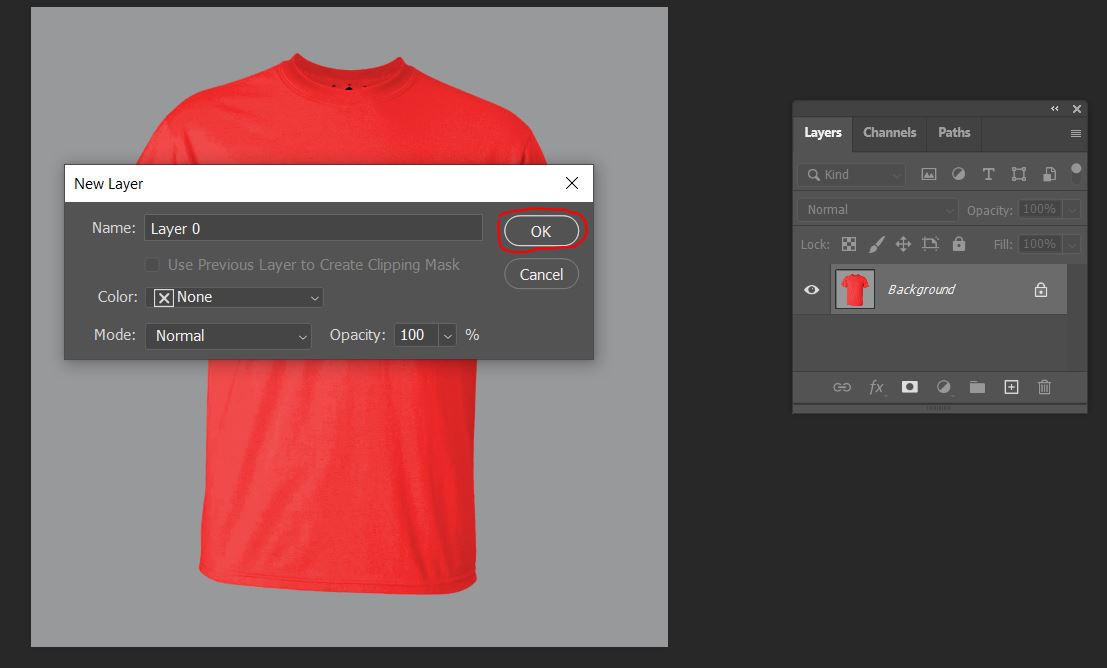
If you can’t see the layers panel then simply appear it to click the Windows —> Layers or press F7 from the keyboard. Currently, you can’t move the background layer caused it has already locked. So firstly we have to unlock the background layer, Double click on the background layer from the Layer panels. Then keep the layer name Layer 0 and press the OK button.
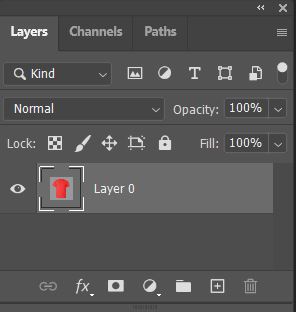
Now, Layer 0 will appear on the layers panel without a lock icon. So we can easily move the layer 0, it was our main aim for this step.
4. Insert a New Layer
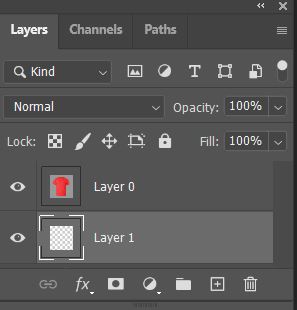
Now that you have an image on the interface, the next thing to do is to insert a new layer. To do this, select Layer > New Layer from the menu bar. Or better yet, you could tap on the Square Plus icon in the layers window.
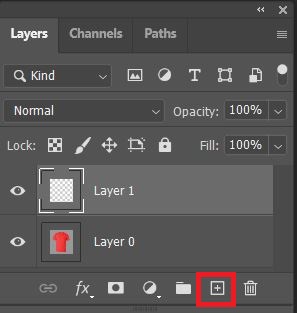
A new layer (Layer 1) which is, of course, a transparent one will be added automatically. With the aid of your mouse, drag the new layer underneath your image layer (Layer 0), and then select your content layer.
5. Trace the Subject of the Image
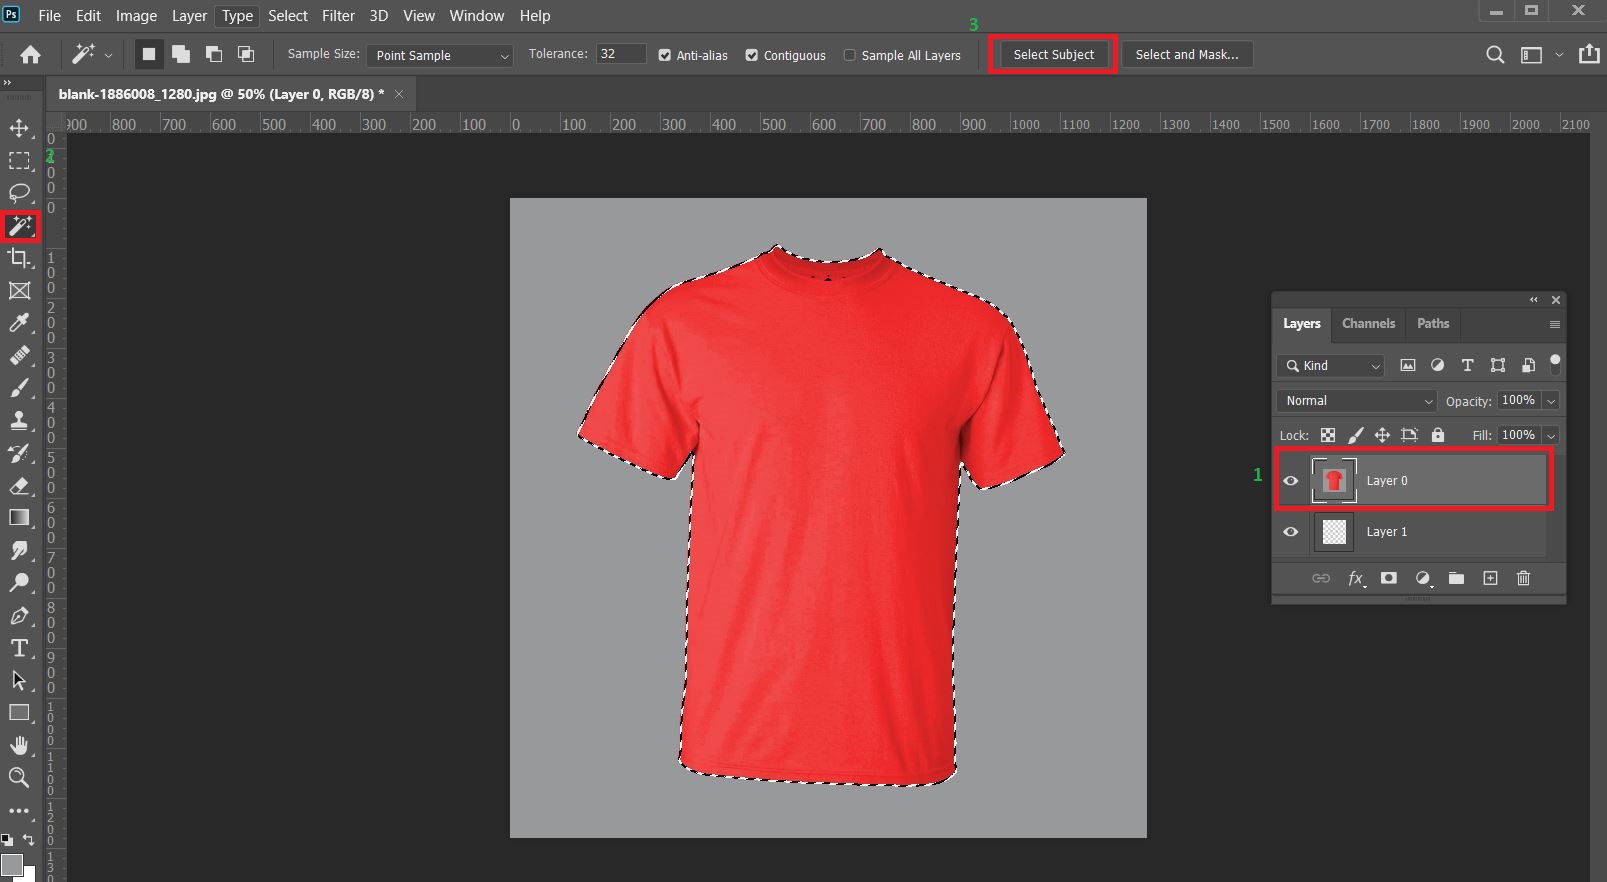
For this step, you need to select the Magic Wand tool from the Toolbar menu on the left-hand side of the software. After that, click on Select Subject from the Options Palette at the top of your screen and Photoshop will start tracing out the subject of your image leaving the background.
6. Invert the Selection
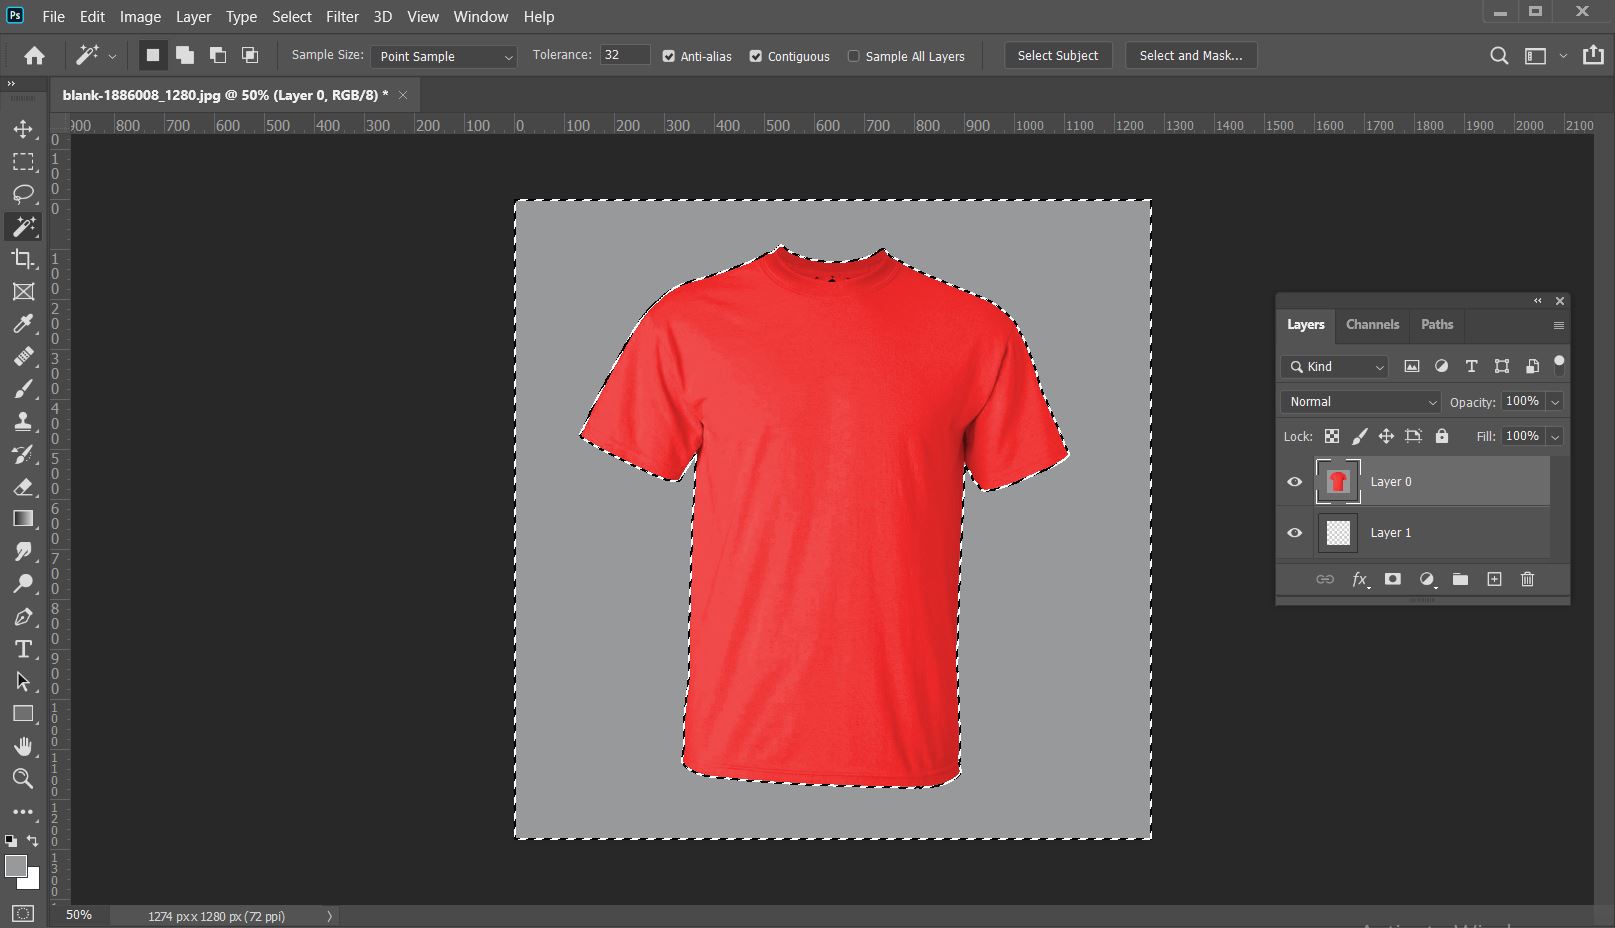
By selecting the subject of the image, you are a step away from deleting it. And our aim is to remove the background. So we have to invert our selection. To do this, the hotkeys:
Shift + CTRL + I (for Windows)
Shift + Command + I (for Mac OS)
And your selection will be inverted instantly. Alternatively, you could choose the Select icon from the top menu and then hit Inverse from the list that appears under the dropdown menu.
7. Add Feather for Smooth Edge
Feather is one of the best features in photoshop to make your product edge smooth and sharp. In this step, we will show you, how to apply feather in photoshop.
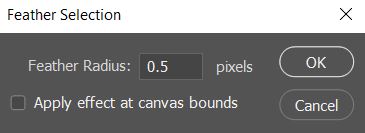
Click Select from the top menu then hit Modify, after that click Feather from the sub-menu. Another way you can do it to use photoshop shortcut keys such as Shift+F6.
Now a feather selection box will appear on the window. Input 0.5 as feather radius then press the OK button. Now we have successfully applied feather for a smooth edge.
8. Delete the current Background
After applied the feather, we have to remove the current background from our product image. Now, press the Delete key on your keyboard to eliminate the selected background. Your image background will be immediately transformed into a transparent one without delay. Woohoo, we have successfully removed the background from an image and make a transparent background. Now, we need to save the image in PNG format.
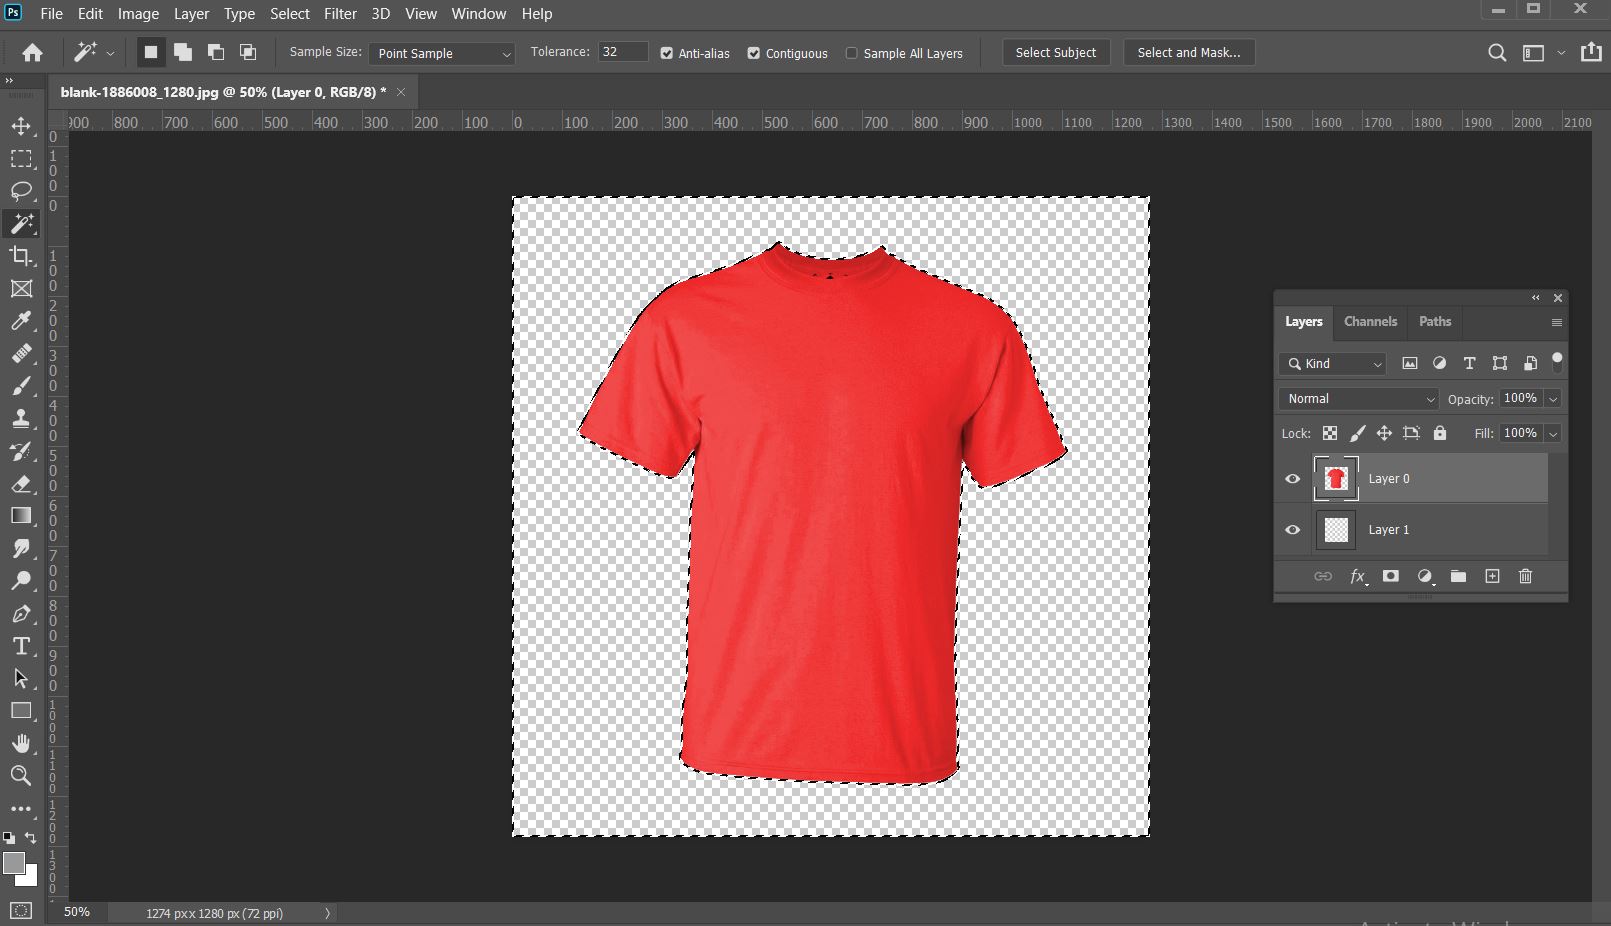
9. Save the Image in PNG Format
After creating a background on Photoshop, you must save the image in the correct format so the changes made don’t revert. As we all know, Adobe Photoshop supports several image formats, but the perfect one for this article is the PNG format. The reason being that PNG 24 gives room for multiple layers of transparency which is what we need here.
Save your image in PNG 24 format on Photoshop by typing Shift + Alt + Ctrl + W (Windows) or Shift + Option + Command + W (Mac OS). Another way to do this is to make the following selections; File > Export > Export As. Mind you, if you use an older version of Photoshop, in place of Export As, select Save for Web and then choose PNG from the drop-down menu that pops up.
Now, a dialogue box will show on your screen. A visual representation of this is shown below:

Look out for the File Settings bar on the right-hand side of the software, set the Format to PNG, and then tick the Transparency box. Ensure that the Smaller File (8-bit) isn’t ticked so your image isn’t saved in the PNG-8 format.
10. Export the Image File
Next, tap on the Export button and you will be directed to the Save dialog box where you will select a folder to save the edited image file. Enter a name for the file so you can easily recognize it when you need it. Once you’ve done this, click on Save to export the image.
Useful Article: you should to read
How to remove background from an image very professionally?
If you don’t have enough time to remove the background from your image then you can hire us. We at Background Remover India offering you Background remover services at a low price with faster delivery.
Conclusion
Now that you have the tutorial guide on how to Make Transparent Background in Photoshop, then changing your image backgrounds shouldn’t be a hard task. Just follow the guide accordingly that’s all. if you think it was a very helpful article for you then feel free to share the post.


