Why do you need Photo Cutout Services?
November 7, 2022
How to use content-aware fill in Photoshop?
November 24, 2022Photoshop is one of the most popular photo editing tools among professionals. It has a dedicated feature for every edit you can imagine yourself making in your photos. Need to enhance the colour saturation? There is a tool for that! Want to remove unwanted objects from the background? There is a tool for that.
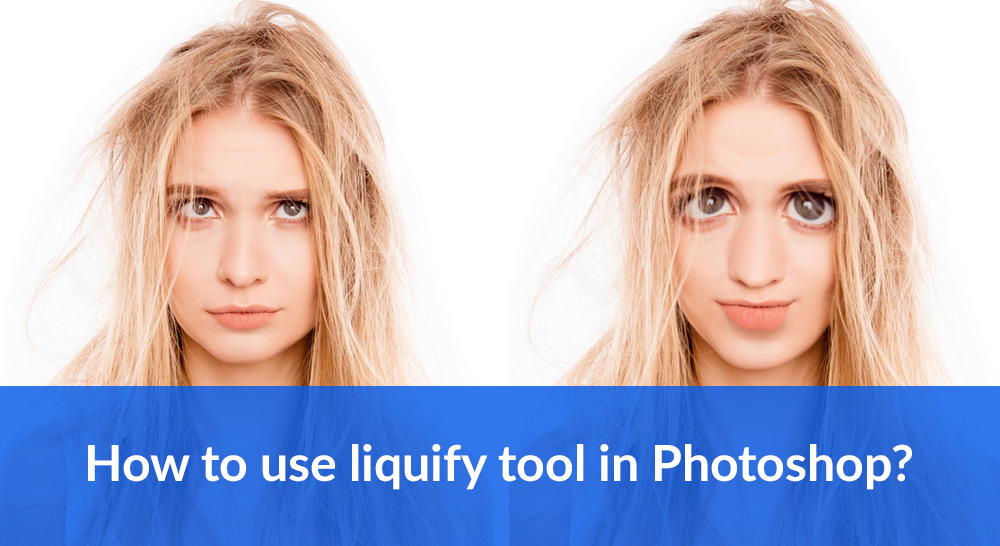
You can even modify a person’s body in the photograph through the liquifying tool in Photoshop. At first, it might seem intimidating to use such complex software, but it’s easy once you start using it and staring familiarizing yourself with its user interface.
The Photoshop Liquify tool enables you to make any kind of body adjustments. From making the body thinner to making it look muscular. You can also get into minute details, such as broadening the eyebrows or making the eyes look bigger. And that is not all, you can also use the liquify tool to push and pool pixels as you wish.
Follow these steps to begin using the Photoshop Liquify tool.
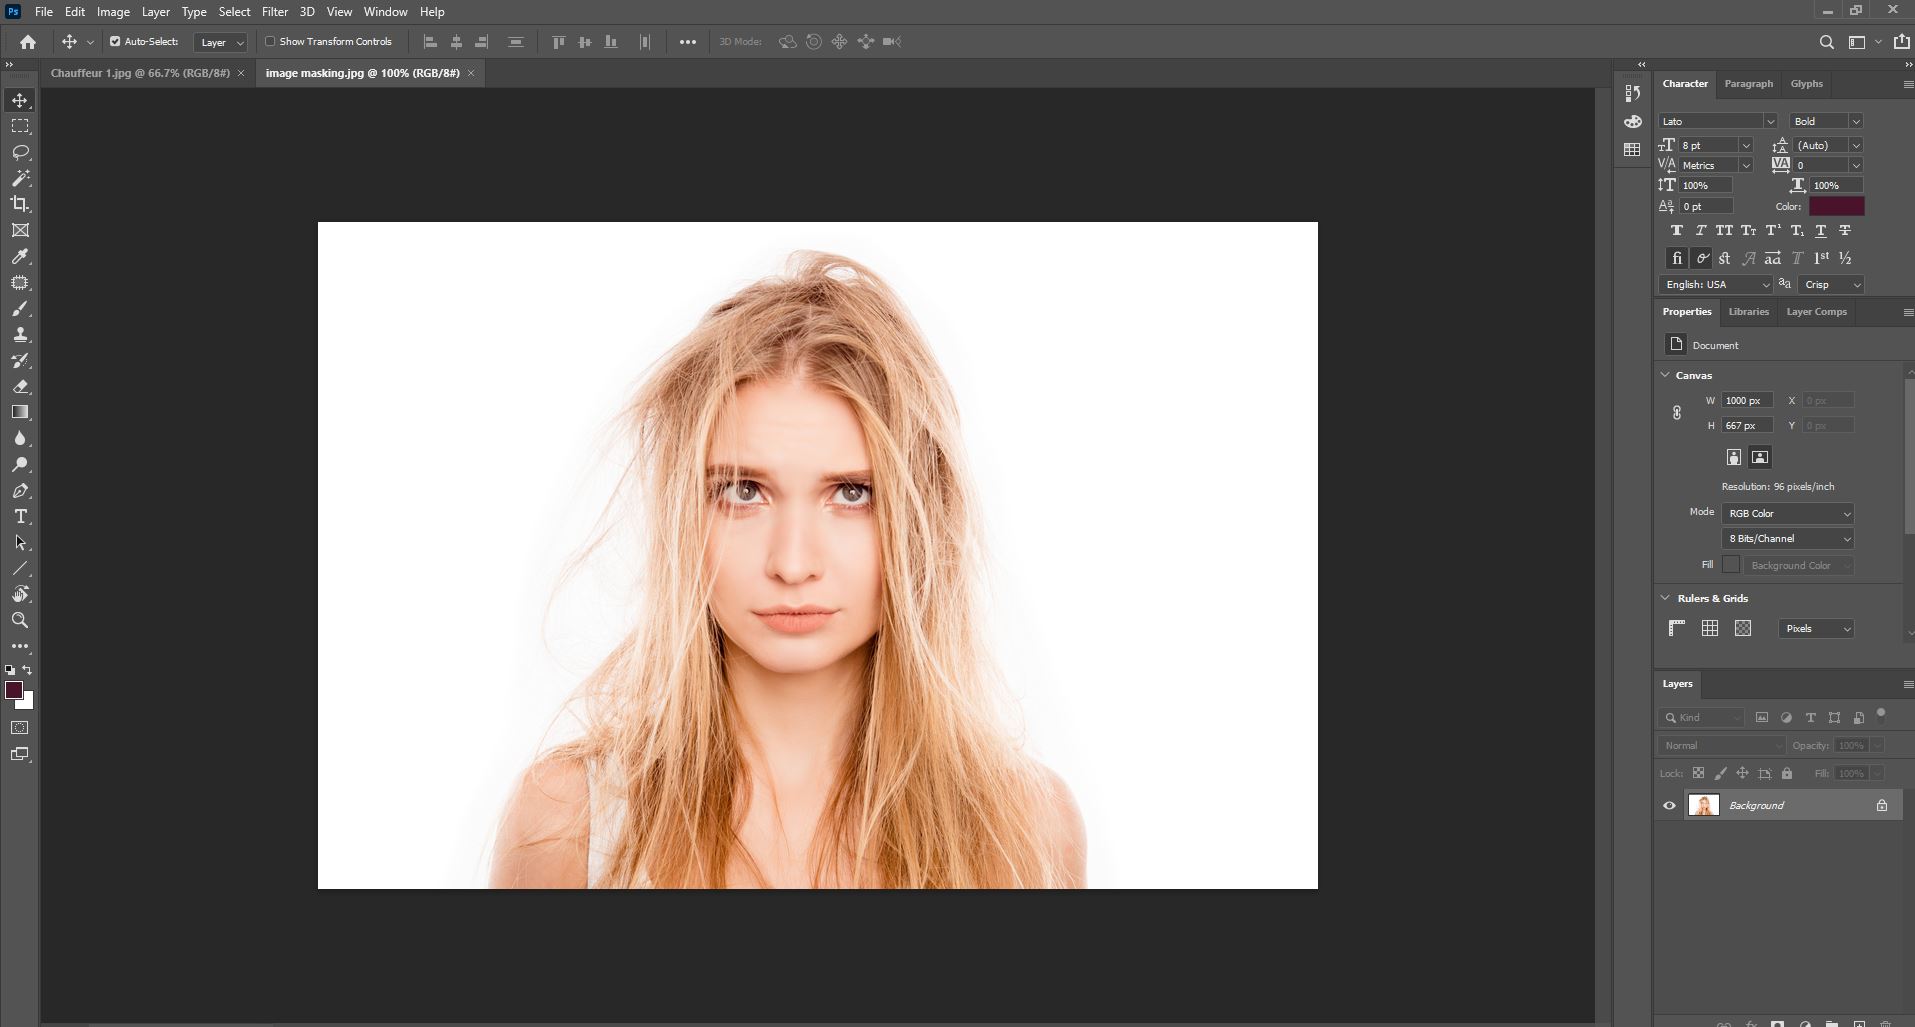
STEP 1:- Choose the image you want to LIquify in Photoshop. Do not expect your first Photoshop edit to be magazine material. Approach it to play around with the tool and understand its functionality. Keep practising, and watch your editing skills improve.
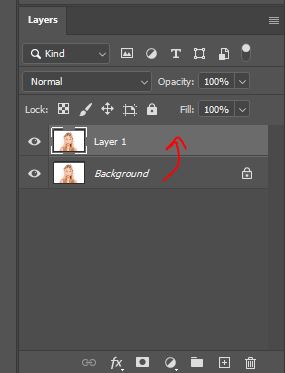
STEP 2:- Create a duplicate image as a new layer. You can easily do it by selecting the Duplicate layer option from the Layer panel (Press ctrl+J) . A window will ask you to provide a name for the duplicate layer. Provide a name and click okay.
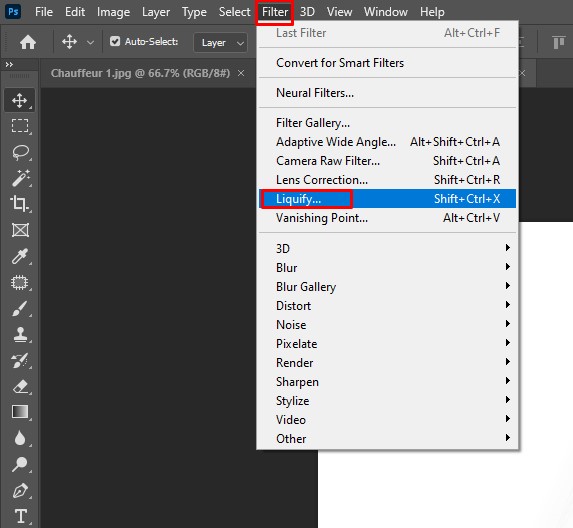
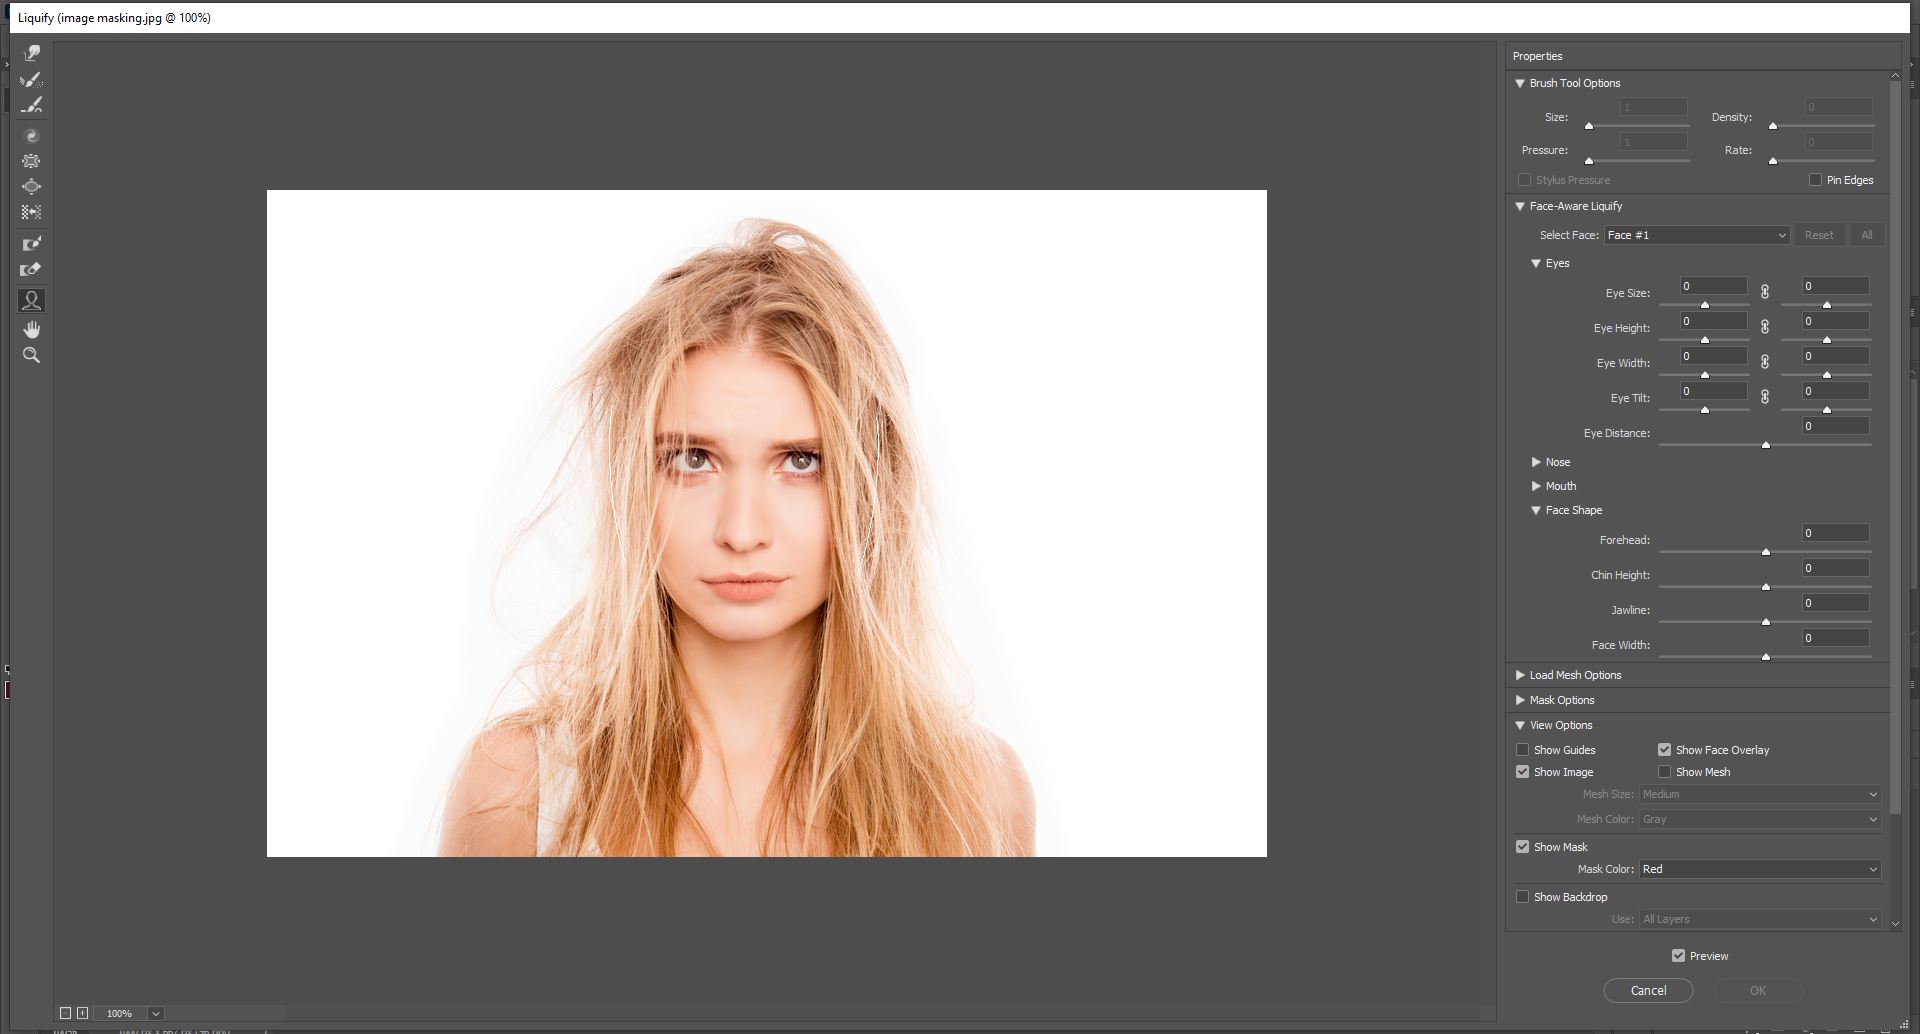
STEP 3:- Now, it is time to get started with the liquify tool. Navigate the Filter drop menu at the top of your screen, and select Liquify.
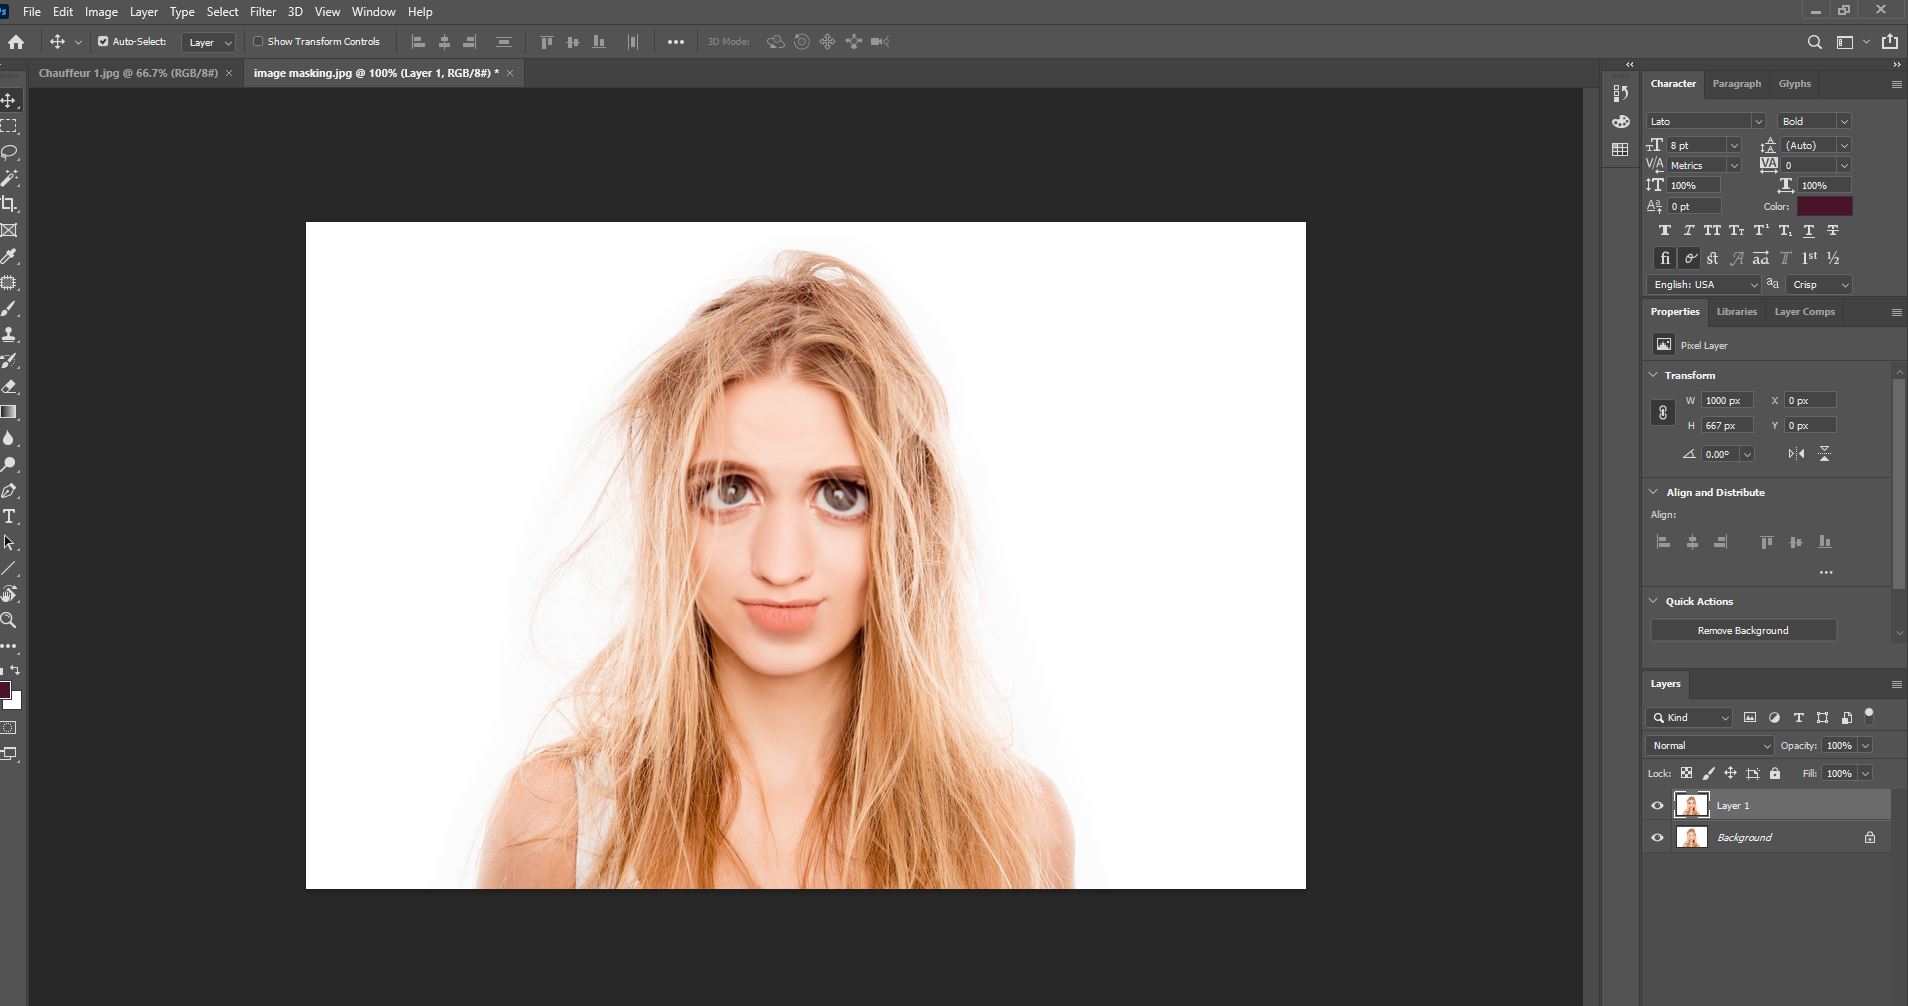
Now pop up a window with liquify interface, so you can liquify your forehead, mouth, nose and face as your wish.
After Liquified,
Understanding the functionality of the Liquify tool:-
The first thing you notice on opening the Liquify tool is a user-friendly layout. You will see seven icons on the left and brush options on the right of the screen. Clicking on the box next to the Advanced Mode provides you access to additional 11 icons on the left and more advanced brush options on the right side of the user panel.
Let us take a closer look at some of the advanced features of the liquify tool.
W – Forward Warp:-
It is one of the most popular features of the liquify tool as it enables you to adjust the hair, clothing, faces, and bodies of the model. You can control the scale of editing through the four brush options, namely size, density, pressure, and brush rate.
Other tools within the liquify filter:-
R – Reconstruct:- This tool helps you restore the original detail of the image after its modification.
E – Smooth:- This tool helps smooth any rough edges or sharp lines, mitigating the end finish of the image.
C- Twirl Clockwise:- This tool twirls pixels clockwise. Use the alt key to reverse the pixels.
S – Pucker:- The function of this tool is to push all the pixels underneath the brush inward.
B – Bloat:- This tool functions the opposite of the Pucker tool.
O – Push left:- It helps you move pixels to your left or right. Move the brush upwards to push the pixels to the left and vice versa.
F – Freeze mask:– It helps you alter certain elements of the image that are near other elements that need not be altered.
D – Thraw Mask:- This tool functions the opposite of the Freeze Mask tool.
H – Hand:- This tool helps you drag the image around the user panel.
Z- Zoom:- It allows you to zoom in and out on the image.
Video Tutorial
Conclusion:-
No matter how overwhelming it may feel while using the liquify tool to edit your first image, it is not that hard. You will feel comfortable as soon as you start paying attention to its easily navigable user interface and familiarize yourself with its functionality. You can use this article as a guide to start using the liquifying tool and ensure skilful editing.

